7 minutes, 16 seconds
Keywords are a great tool that can be utilized to add a bit of automation to your SMS marketing initiatives. On CCAI, we offer users the ability to set keyword actions for when a user opts-in using your keyword. Currently, CCAI offers 2 keyword actions, one, for setting up an automated response and, two, for sending contacts to a list.
In this guide, we will show you how to use the two keyword action options available on CCAI to help streamline your customer relationships.
Add a Contact to a List
When a person texts you with the keyword, you can automatically send them to a contact list of your choice. By configuring this keyword action, you can reduce the time it takes to individually respond to each message when a user opts-in.
For users that leverage various keywords for different audiences, this option will help them keep their lists organized.
- To start things off, make sure that you’re logged in, then click on Settings in the left-hand menu, and select the phone number you wish to set up a keyword for.

2. Next, click Add Keyword Action.
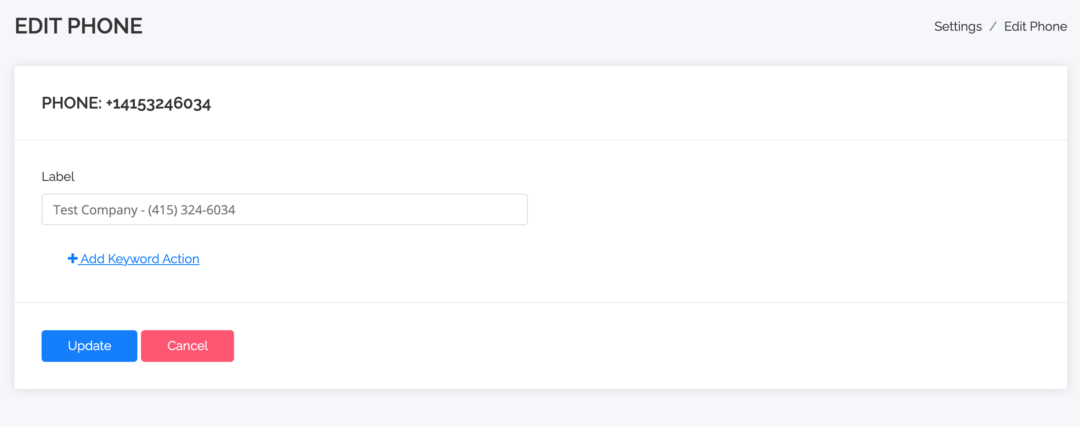


3. Next, you will add a keyword. You can choose a random string of numbers or characters. For example, we might choose CLOUD as our keyword because our name is Cloud Contact. After you have typed in your keyword, press Enter on your keypad.
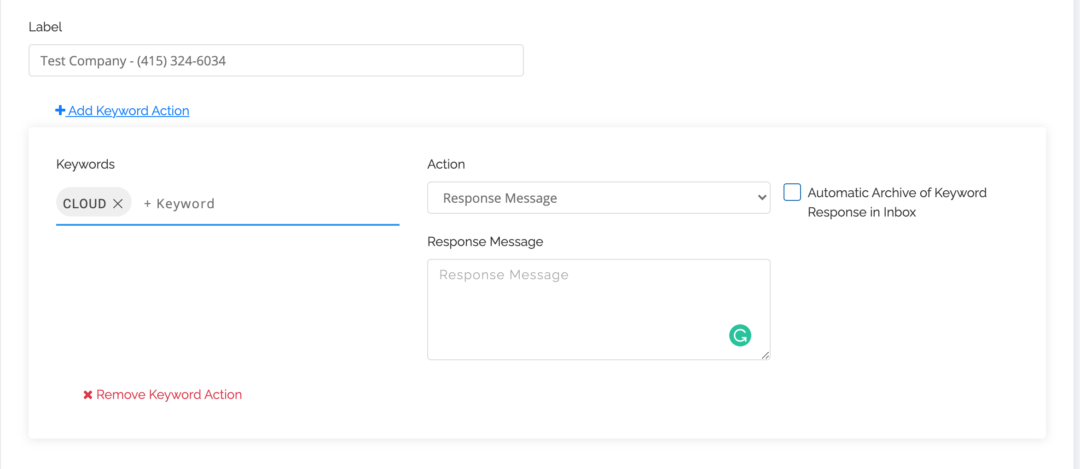


4. Under the Action section, click the arrow to choose more options and select Add Contact to List.
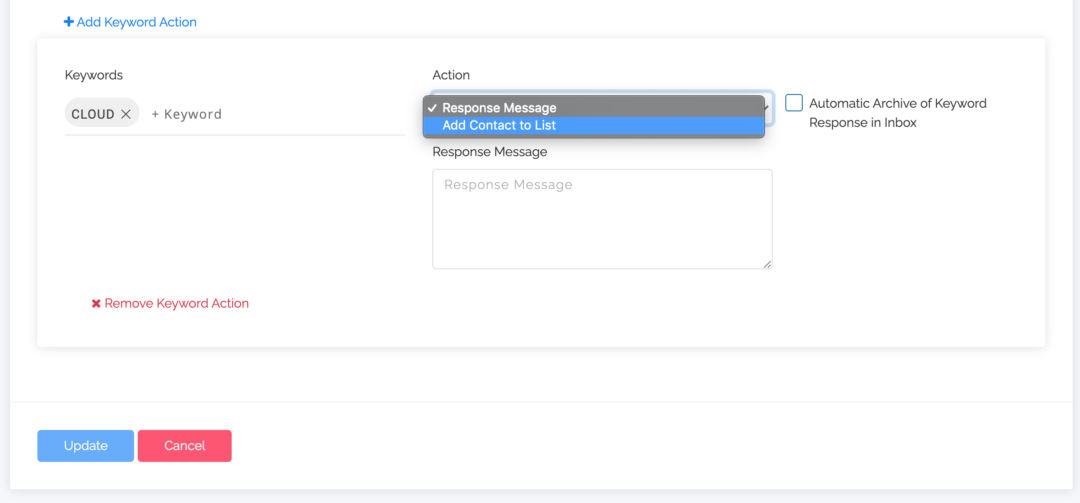

5. Now click on the search bar in the List section. A dropdown of your contact lists will display and you will select which list you would like to add your contacts to.
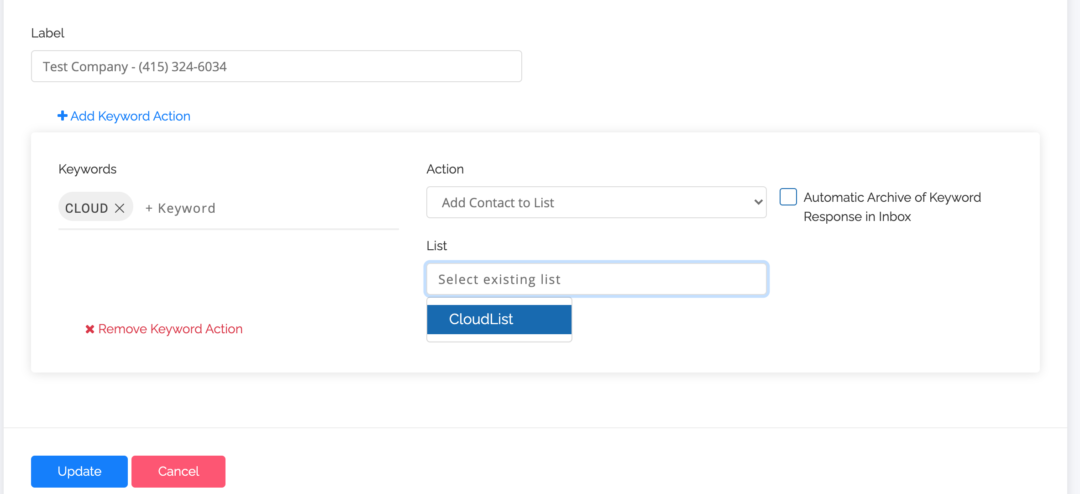

6. Now you can choose to have users who opt-in with a keyword go to the Archive folder in your inbox. If this is of interest to you, select the checkbox next to Automatic Archive of Keyword Response in Inbox.
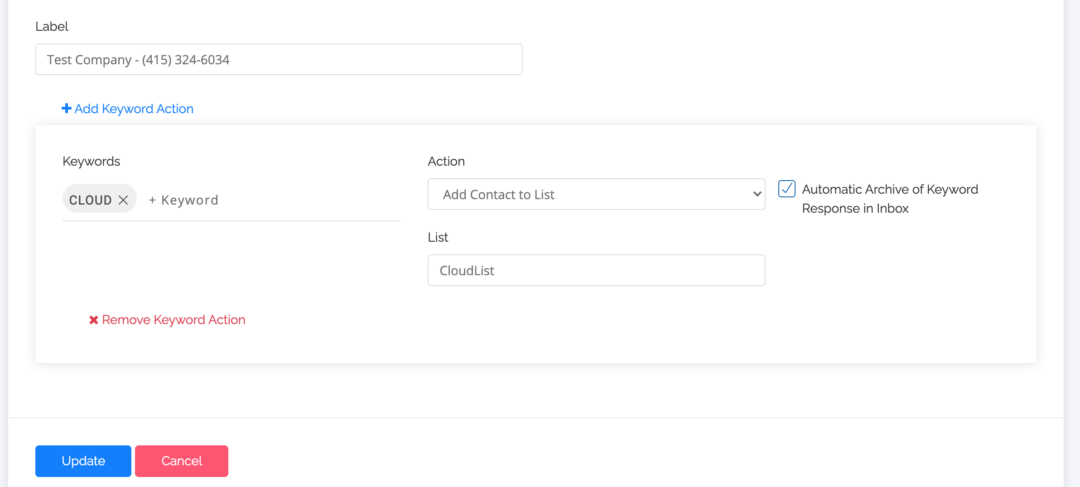

7. Finally, after all of the fields are complete, you can select Update to save this action. You can now start promoting your keyword to your audience.
Automated Response
When a person texts you with the keyword you provided them, you can send them an automated response. Using automatic responses is a great way to quickly and automatically welcome your customers with little effort – leaving a lasting impression on them from the very beginning.
1. To get started, select Settings from the left-hand menu and choose the phone number you would like to set up a keyword for.


2. After you have selected the phone number, click Add Keyword Action.


3. Next, you will add a keyword. You can choose a random string of numbers or characters. For example, we might choose CLOUD as our keyword because our name is Cloud Contact. After you have typed in your keyword, press Enter on your computer’s keypad.


4. Under the Action tab, Response Message is already selected so there is no need to change anything there. Go ahead and add in the message you would like your users to receive once they have opted-in with the keyword you just created.
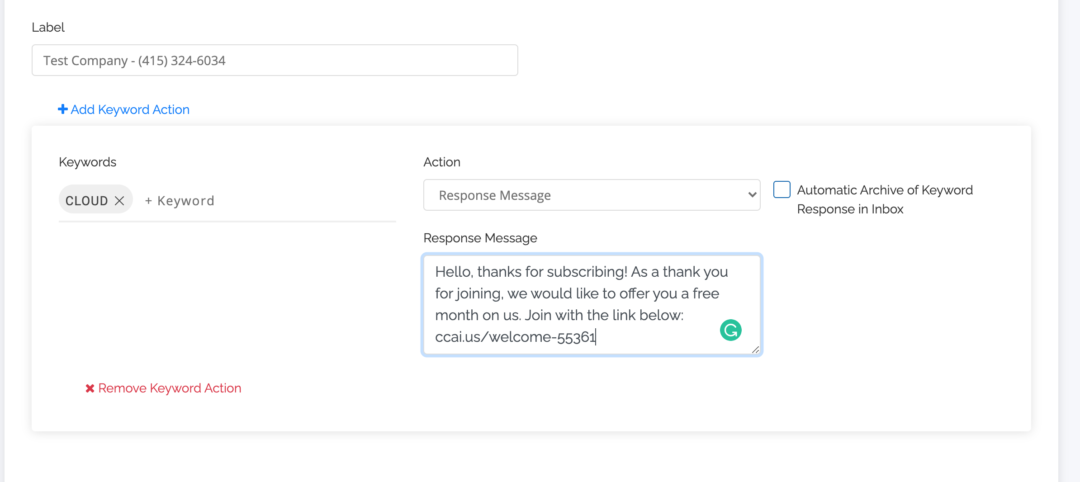

5. Now, you can choose to have users who opt-in with a keyword go to the Archive folder in your inbox. If this is of interest to you, select the checkbox next to Automatic Archive of Keyword Response in Inbox.
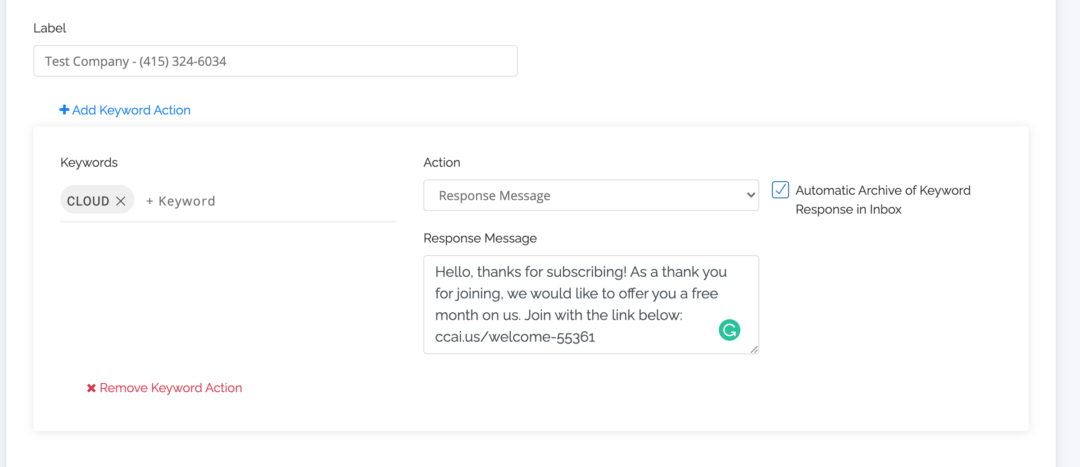

7. Finally, after all of the fields are complete, you can select Update to save this action. You can now start promoting your keyword to your audience.
