
2 minutes, 28 seconds
Zapier offers a means to automate their users’ worlkflows across thousands of apps.
When you integrate with Zapier, you can automate your use of CloudContactAI to efficiently communicate with your customers through SMS.
How to integrate your Zapier account with CCAI:
1. Log in to your Zapier account.
2. Go to My Apps
3. Search for CloudContactAI and click on “+Add Connection”. Then, click connect.
4. In the empty field in the screenshot below you will see where your API Key from CCAI will go. There’s also instructions for how to get the API key, which we will follow in the next step.
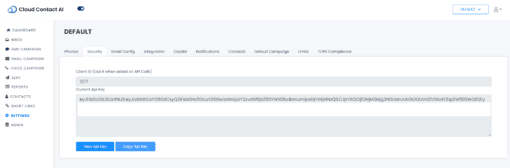
5. So, to get your API Key, go to https://app.cloudcontactai.com/login and log in to your CCAI account.
6. Once you’re logged in, click on Settings in the menu.
7. Click on the security tab and you will see the API Key page. If you don’t have an API already, click “New Api Key”. From this point using your new Api key, or an exisitng one, click “Copy Api Key”.
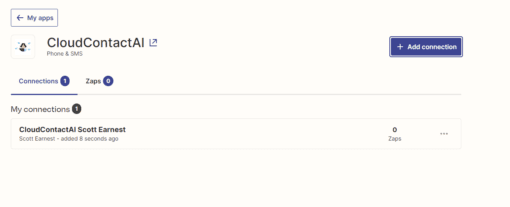
8. Paste the API Key into the empty field in Zapier. Then click, “Yes, Continue.”
9. You’ll be brought back to the My Connections page where you’ll see you now have a connection with CCAI!
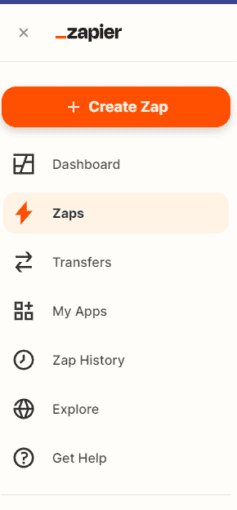
10. Now we’ll create a Zap. So go back to your home page and click on “+ Create Zap”
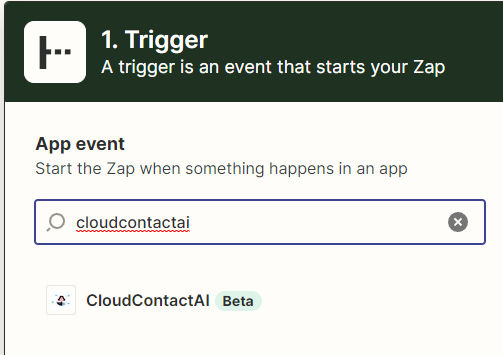
11. Search for and select CloudContactAI.
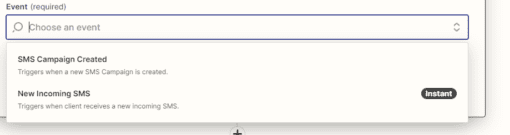
12. Choose the event you want to perform. In this case, I selected “New Incoming SMS”. The automation we are creating will be initiated when our CCAI inbox receives a new incoming SMS.
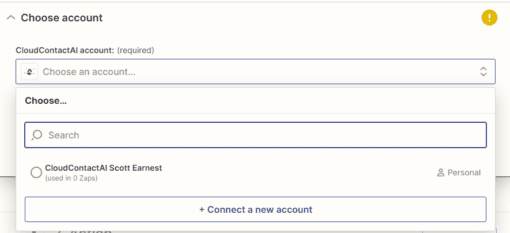
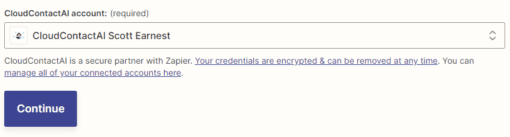
13. Choose the CCAI user that you want perform the automation/Zap with. Once you’ve selected the user, click continue.
14. Then, you’ll need to click on “Test Trigger.”
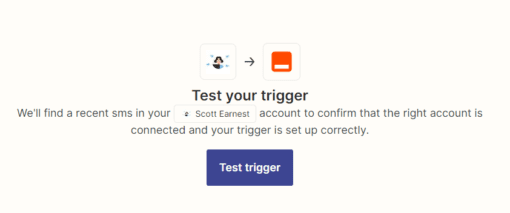
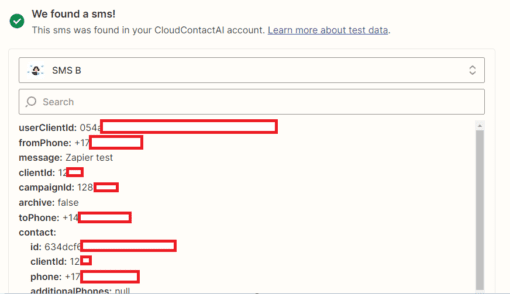
15. A list of text messages received by your CCAI account will appear. Choose one and click continue.
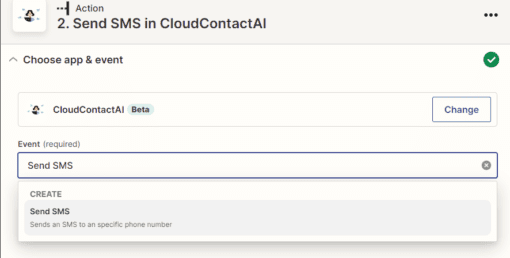
16. Now we will create an action to perform when the previous event occurs. Again, select CloudContactAI:

17. And we’ll select “Send SMS” for our next event/action.
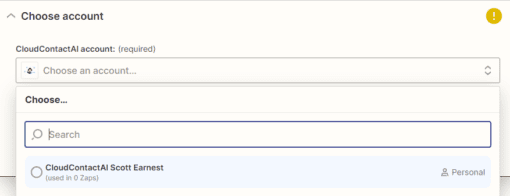
18. Select the CCAI user we will want to send the SMS with:
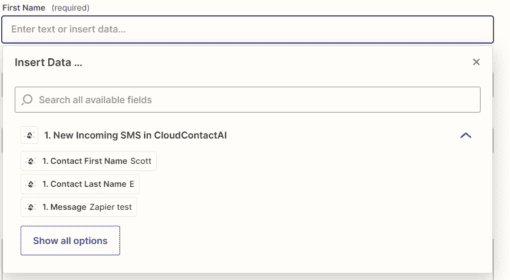
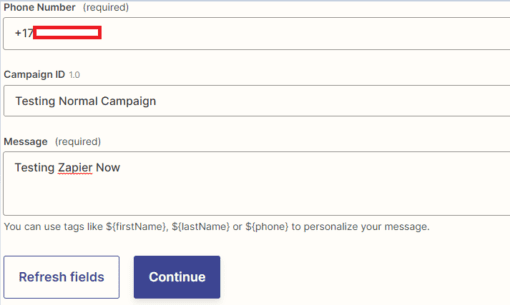
19. Fill in the data fields for your Zap configured SMS. This information will determine what is in your automated message and who you will send it to.
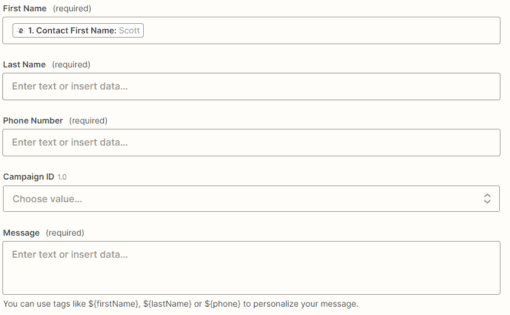
20. Once all your fields are filled, you can click continue:
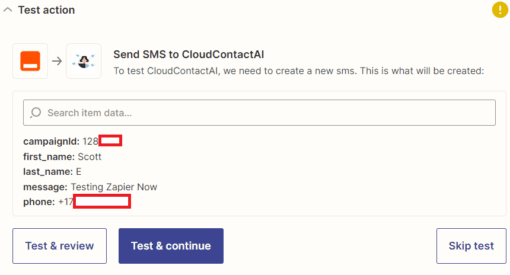
21. You can then test your Zap by clicking “Test and Continue”. The number you sent your test SMS to should receive a message.
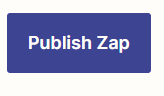
If your test SMS was sent succesfully, you will then click “Publish Zap”.
Congratulations, you’ve now created a Zap that is integrated with your CCAI account. So whenever someone texts your CCAI user, Zapier will automatically text them back using the Zap that you’ve setup.
Using CCAI and Zapier together can enable you to more easily communicate with your customers. Try it for free today at https://app.cloudcontactai.com